ブログ

  • スモールスタートの考え方を業務に生かすには?

    スモールスタートの考え方を業務に生かすには?

    ビジネスシーンでよく使われる「スモールスタート」という言葉は、生活習慣の見直しから事業の立ち上げまで幅広い範囲に応用できる考え方です。しかしそれ故に、状況や個々の認識によって、言葉の意味合いが微妙に変わってくる面もあります。

    ここでは、日々の「業務」に役立つスモールスタートの手法を、具体的な例とともに解説していきます。

    スモールスタートとは?

    新規事業の立ち上げなどで使われる「スモールスタート」という言葉には、「最初は限定的なサービスから始めて、需要などによって徐々に規模を拡大していく」といった意味合いがあります。

    一方、業務の効率化など、業務改善活動におけるスモールスタートは、その言葉通り「業務の一部から小さく始める」という意味で使われることが多いようです。本記事では、業務管理や業務改善活動におけるスモールスタートについて、業務の自動化をテーマに述べていきます。

    スモールスタートのメリット

    スモールスタートのおもなメリットとしては、

    • 費用・人員・時間といったコストを抑えてスタートできる

    ことが挙げられます。業務に限らず、何かをいきなり「大きく始める」のは、費用や時間、労力といったコストを考えてもリスクの大きいやり方です。

    逆に「小さく始める」と、準備やスタート、管理などにかかるさまざまなコストを抑えられるだけでなく、変更や撤退といった「小回り」がききやすいという利点もあります。

    たとえば、業務の自動化においては「何を自動化したいのか?」ということを絞り込み、その部分にまっすぐアプローチすることから始めるのがスモールスタートといえます。

    つまり、スモールスタートには

    • もっとも改善したいポイントに迅速にアプローチできる

    というメリットもある訳ですね。

    また、自動化をおこなうポイントが絞られていれば、問題が発生したとしても影響の及ぶ範囲は限定的となります。そのため、

    • トライ&エラーで成果を上げやすい

    のも、スモールスタートのメリットといえます。

    なお、取り組みの範囲が限定的であれば、チーム内で共有しておかなければならない事項も少なくなります。このようにメンバへの負担を軽くして、共通理解を得やすくすることで、スタート後の展開をスムーズにできるのもスモールスタートの強みです。

    スモールスタートの注意点

    しかし、いくら「コストを抑えて迅速にアプローチできる」のがスモールスタートの利点だといっても、ただ闇雲に取り組むのはオススメできません。

    上の項では「何を自動化したいのか?」というポイントを絞ることについて述べましたが、自動化によって業務を効率化したいのであれば、まずは、

    • 「目的」と「目標」を明確にする

    ことが大切です。

    「なんのために?」「なぜ?」といった「目的」を明確にすること。さらに、業務を「どの程度」「どのように」改善したいのかという「目標」を定めること。これらはスモールスタートで業務改善活動をおこなう上で欠かせない手順です。

    しかしこうした、目的・目標を設定するためには、「いま、業務上にどのような課題や問題があるのか?」ということをしっかり把握できていなければなりません。

    ではどのようにして、こうした課題や問題を明確化すればよいのでしょうか?

    スモールスタートによる業務自動化の例

    1. 問題や課題をハッキリさせるには?

    業務に潜む問題や課題を明確にするには、まずは業務の流れを図式化して、客観的に見てみることをオススメします。

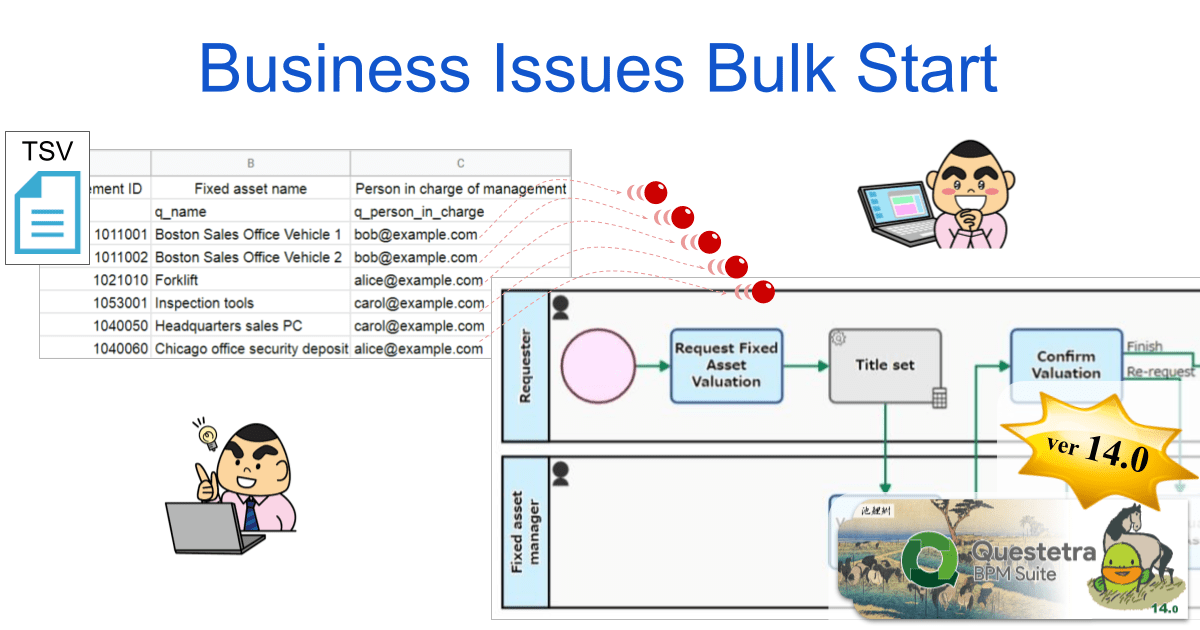
    下の図は、BPMN という表記法で描いた業務プロセス図の例です。大まかにいうと、工程(タスク)を角の丸い四角形で表し、それを矢印でつないだ「業務プロセス図」です。

    こうした図を描くことで「誰が」「どんなタイミングで」「どのような」作業をしているのかが明確になり、業務全体の流れを把握しやすくなります。

    そこから一歩進んで、各工程における仕事の「滞留時間」や、1件あたりの「処理時間」、あるいは一定時間における「処理件数」などを計測することで、ボトルネック(人間・機械・ソフトウェアを問わず、もっとも非効率となっている箇所)など、業務上の問題点が見えてきます(この「計測」作業は、次の項で述べるワークフローを使用することで、よりスムーズにおこなえます)。

    2. 業務をいかに改善するか?

    さて、業務プロセス図を描き、問題や課題を発見できれば、いよいよ「どのようにして業務を改善するか?」を検討することになります。

    改善の手段を選ぶ際には、導入にかかるさまざまなコストや費用対効果などを予測し、現状に対して妥当な方法を選ぶのが一般的でしょう。

    業務の自動化であれば、たとえば下記のような手段が考えられます。

    1. RPA ツールで特定の作業を自動化する
    2. ワークフローで業務の進行を自動化する

    1 の場合は、業務プロセスの中の1つの工程を RPA ツールで自動化することからスモールスタートします。たとえば、従来は人がおこなっていたデータの収集・加工・抽出などの作業を、ロボットに代行させる訳ですね。RPA ツールによる業務自動化では、「どの工程を自動化するのか?」ということが重要となりますが、これまで述べたような「業務プロセスの図式化→計測」という作業を順当におこなえば、おのずと「RPA ツール導入のポイント」も見えてくるはずです。

    一方、2 の場合はワークフローと呼ばれるソフトウェアを使って業務プロセスを視覚化しつつ、業務全体の「流れ」を自動化します。

    たとえば、

    • 業務の進捗状況が把握しづらい
    • 仕事の受け渡しに手間がかかる

    といったことが業務を進める妨げとなっているならば、ワークフローで業務を管理すれば問題は解決します。ワークフローは、パソコン上で作成した業務プロセス図に沿って業務を管理するソフトウェアであり、進捗状況の把握や共有を容易にします。また、ワークフローでは仕事の受け渡しも自動化されることから、スムーズに効率よく業務を進行できます。

    スモールスタートからスケールしていく

    スモールスタートの考え方が「部分から小さく始めて、全体に広げていく」ことである以上、小さく始めたことを「どう広げていくか?」を想定しておくことはとても大切です。

    RPA の例でいえば、自動化する工程やロボットを増やすというスケールの仕方がまず考えられます。これは、スモールスタートで RPA ツールの導入に成功したのであれば順当な方法に思われます。ただしこの場合には、ロボットの数を増やし、管理していくのにかかるコストを十分に考慮する必要があります。

    一方、ワークフローを使って業務プロセスの自動化に成功したのであれば、他のプロセスにワークフローを適用したり、ワークフロー同士を連携させたりといったスケールも可能です。

    ちなみに上の項でも述べた通り、RPA ツールによって自動化できるのはあくまで部分的な作業です。そのため、RPA ツールを導入する際には「自動化された工程」と「人がおこなう工程」の間での「仕事の受け渡し」にも留意する必要があります。たとえば、「人が RPA ツールにデータを渡す手間」「RPA による成果物を人が受け取る手間」などが大きいと、自動化をおこなっても、そのメリットは実感しにくいでしょう。

    そこで、こうした問題を解決する手段として、

    • ワークフローと RPA ツールを連携させる 

    という方法があります。

    つまり、上の項で述べた2つの手法をプラスする訳ですね。ワークフローでは「人と RPA」の間の仕事の受け渡しも自動化できるため、RPA ツール導入における「仕事の受け渡しの手間が増える」といったリスクを回避できます。

    また、RPA ツールとワークフローの連携により、

    • 業務プロセスの任意のタイミングでワークフローから RPA を起動
    • RPA ツール向けのタスクが届いたらそれを自動で選別して処理

    といったことも可能となります。

    こうした機能を上手に活用すれば、スモールスタートした業務自動化も、途中で挫折することなくスケールしていけるでしょう。

    Questetra BPM Suite でスモールスタートの第1歩を

    これまで、業務自動化を例にスモールスタートについて述べてきましたが、「部分から小さく始めて、成果を見つつ範囲を広げていく」のにも、さまざまな視点があることがおわかりいただけたのではないでしょうか。

    業務の改善や効率化におけるスモールスタートは、

    • 全体を俯瞰しながら、問題や課題のある箇所にダイレクトにアプローチする

    のが理想的といえますが、その際に強い味方となるのが、上の項でも述べたワークフローです。

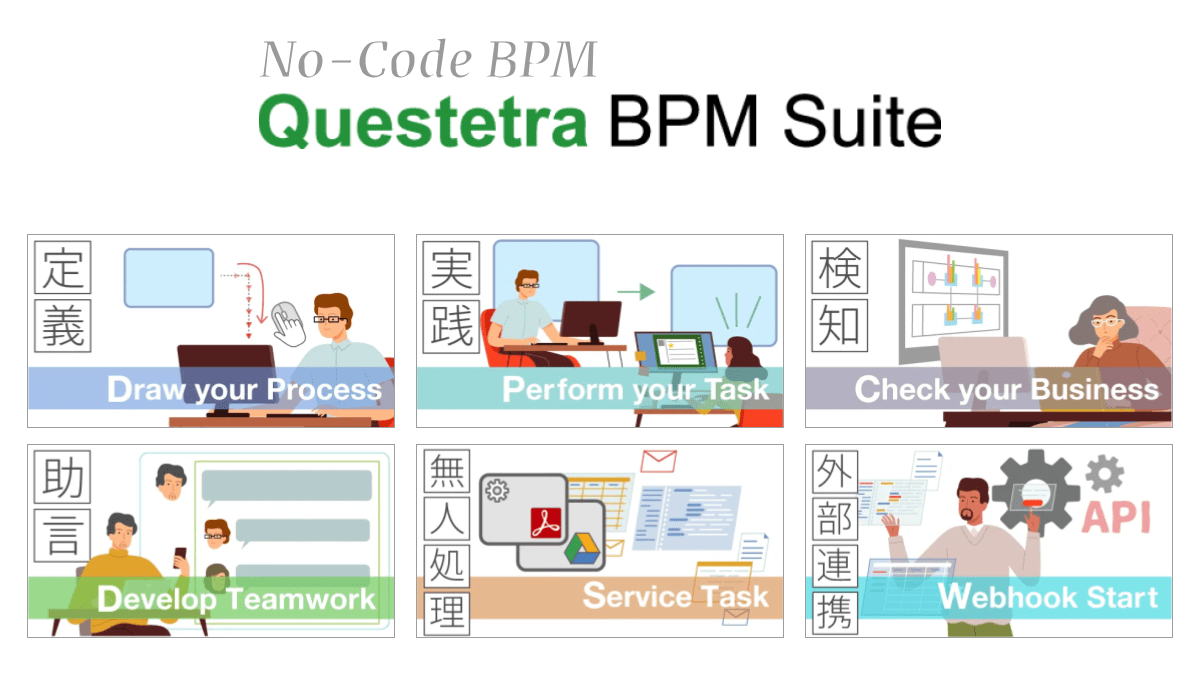
    さて、弊社が提供している Questetra BPM Suite はワークフローの中でも「クラウド型」といわれるものです。

    この「クラウド型」はお申し込み後すぐにご利用できるため、スモールスタートに適しています。またインターネット環境さえあれば、オフィスと同じシステムにどこからでも簡単にアクセスして仕事ができるのも強みです。

    この機会に、無料でお試しできる Questetra BPM Suite で、スモールスタートの第1歩を踏み出してみませんか?

  • Recommendation for Automation – Box Folder Share

    Recommendation for Automation – Box Folder Share

    Original Japanese version

    Hi there!

    In Recommendation for Automation – Box File Share we showed how to enable files uploaded to Box to be shared with people outside the company.

    The mechanism described in this article limits the number of files that can be shared to one, but this article will show you how to build a mechanism that facilitates the sharing of multiple files.

    No-Code Development Platform Questetra BPM Suite

    The cloud-based no-code development platform Questetra BPM Suite is used to automate operations.

    In Questetra BPM Suite a business system is constructed through the creation of workflow diagrams. In the constructed system, business data is not only digitized, the system also automates the transfer of business data between people, as well as performing text conversion, numerical calculations, email transmission, etc. Furthermore, data integration to other cloud services can also be automated.

    No-Code Development Platform Questetra BPM Suite Overview

    Such automation is achieved by placing items in the workflow diagram that will be automatically processed in some way at the desired time. For example, when the sales manager approves a quote, the quote file is uploaded to Box.

    Various automation items available in Questetra BPM Suite will allow you to automate your operations easily.

    Box Cloud Storage Folder Creation

    Box is a cloud storage service for businesses. The Box case studies page lists over 100,000 customers and 67% are Fortune 500 companies (confirmed 2022-02-15).

    The automation items provided in the Questetra BPM Suite (v13.3.0) introduced in the previous section are related to Box.

    • Box: Upload File
    • Box: Copy File
    • Box: Move File
    • Box: Create Shared Link to File
    • Box: Delete Shared Link of File
    • Box: Delete File
    • Box: Download File
    • Box: Create Folder
    • Box: Search Folder
    • Box: Create Shared Link to Folder
    • Box: Delete Shared Link of Folder
    • Box: Delete Folder
    • Box: Add Collaboration
    • Box: Delete Collaboration

    [Box: Upload File], [Box: Create Folder] and [Box: Create Shared Link to Folder] (shown above in bold) will be used for the mechanism to be created in the next section.

    Automated Submission of Approved Quotations

    In Recommendation for Automation – Box File Share we created a system where approved quotes are automatically submitted to customers.

    There is one limitation to this mechanism. Only one file can be submitted at a time.

    When a salesperson submits a quotation it is not uncommon for it to be submitted together with several other documents, for example, a proposal, a price list, and service/product introduction materials. Sometimes multiple quotations are submitted. In addition, for the sales manager who approves the quotation, the documents submitted at the same time as the quotation may have a significant impact on the approval decision.

    The system we are building will allow automatic submission of multiple files to customers.

    The following operations are systematized using Questetra BPM Suite.

    • A salesperson creates a quotation file.
    • The sales manager decides whether to approve the quotation file.
    • A folder is created in Box.
    • A shared link is generated in the created folder.
    • The approved quote file is uploaded to the folder created in Box.
    • An email is sent to the customer with the shared link to the quote file.

    Within this workflow, the latter four processes (in bold) are handled automatically.

    First, we will create a workflow diagram of this business. (Constructed with Questetra BPM Suite below)

    Quote Approval Workflow Diagram

    The following three processes in the workflow diagram are handled by people (blue square item)

    • 1. Quotation Preparation (by sales staff)
    • 2. Quotation Approval (by sales manager)
    • 3. Response to Feedback (by sales staff)

    If the quotation is approved in [2. Quotation Approval] a folder will be automatically created on Box. The gray item [4. Create Folder] will automatically create a shared link to the folder. [5. Upload Quotation] will automatically upload the approved quotation to the folder.

    Finally, [7. Email to Customer] will send an email to the customer with the shared link inserted.

    Setting up Automated Items

    Create a parent folder in Box where the folder for submission will be created. Set the part of the URL of the created parent folder (the blue part below) in “C2: Parent Folder ID” in [4. Create Folder].

    https://example.app.box.com/folder/xxxxxxxxxxx

    Create & Approve Quotes Processing Screen
    Automatic creation of folders for Box quotation submission
    Quote Approval Workflow

    Summary

    We introduced how to build a system in which multiple files are automatically uploaded to Box cloud storage and a shared link is created to the folder in which they are stored.

    The following process has been automated.

    • A folder is created in Box
    • A shared link is created in the created folder.
    • Approved quote files are uploaded to the Box folder with the related documents.
    • An email with the shared link is sent to the customer

    This automation reduces the time and effort required to create folders, set up shared links, and send e-mails to customers. In addition, the following mistakes are prevented compared to manually doing these tasks.

    • Forgotten or delayed folder creation
    • Failure to set up shared links
    • Failure to set up shared links (incorrect expiration date or password)
    • Forgotten or late uploading of files
    • Incorrect file upload location
    • Incorrect email address or body

    By using the automation items provided in Questetra BPM Suite, a no-code development platform used for automation, you can build a system in which files are automatically uploaded to Box and shared links are automatically created, even if you have no knowledge or experience with Box’s API (Application Programming Interface).

    Questetra BPM Suite is available on a 60-day free trial basis. If you are interested please apply from the following link.

  • Recommendation for Automation – Box File Share

    Recommendation for Automation – Box File Share

    Original Japanese version

    Hi there!

    In Recommendation for Automation – Box File Upload we showed you how to build a system in which files are automatically uploaded to the Box cloud storage. It is well worth it to eliminate the hassle of file uploads. However, there is a limitation in the system we built in this article: the files can only be shared with people in your company.

    This article will show you how to build a system that allows you to share files with people outside the company.

    No-Code Development Platform Questetra BPM Suite

    The cloud-based no-code development platform Questetra BPM Suite is used to automate operations.

    In Questetra BPM Suite a business system is constructed through the creation of workflow diagrams. In the constructed system, business data is not only digitized, the system also automates the transfer of business data between people, as well as performing text conversion, numerical calculations, email transmission, etc. Furthermore, data integration to other cloud services can also be automated.

    No-Code Development Platform Questetra BPM Suite Overview

    Such automation is achieved by placing items in the workflow diagram that will be automatically processed in some way at the desired time. For example, when the sales manager approves a quote, the quote file is uploaded to the Box.

    Various automation items available in Questetra BPM Suite will allow you to automate your operations easily.

    Box is a cloud storage service for businesses. The Box case studies page lists over 100,000 customers and 67% are Fortune 500 companies (confirmed 2022-02-15).

    The automation items provided in the Questetra BPM Suite (v13.3.0) introduced in the previous section are related to Box.

    • Box: Upload File
    • Box: Copy File
    • Box: Move File
    • Box: Create Shared Link to File
    • Box: Delete Shared Link of File
    • Box: Delete File
    • Box: Download File
    • Box: Create Folder
    • Box: Search Folder
    • Box: Create Shared Link to Folder
    • Box: Delete Shared Link of Folder
    • Box: Delete Folder
    • Box: Add Collaboration
    • Box: Delete Collaboration

    [Box: Upload File] and [Box: Create Shared Link to File] (shown above in bold) will be used for the mechanism to be created in the next section.

    Automated Submission of Approved Quotations

    In a previous article, Recommendation for Automation – Google Drive: Upload File we showed how approved quote files are automatically uploaded to Google Drive. In Google Drive the share settings for a folder are set to “Anyone with the link” so that files uploaded to that folder can be shared with people outside the company.

    Box does not have a similar setting, but it does allow you to create a shared link to a file. When a shared link is created for a file, anyone who knows the link will be able to access the file. It is also possible to set an expiration date for that link and a password to view the file.

    Using [Box: Create Shared Link to File] in Questetra BPM Suite you can build a system that automatically creates a shared link to a file.

    This time, the following operations will be systematized using Questetra BPM Suite.

    • A salesperson creates a quotation file.

    The latter three processes (in bold) of this work flow are processed automatically.

    First, we will create a workflow diagram of this operation. (Constructed with Questetra BPM Suite below.)

    Quotation Approval Workflow Diagram

    The following three processes in the workflow diagram are handled by users (blue square items)

    • 1. Quotation Preparation (by sales staff)
    • 2. Quotation Approval (by sales manager)
    • 3. Response to returned quotations (by sales staff)

    If the quote is approved at [2. Quotation Approval], the approved quote will be automatically uploaded to Box in the gray item [4. Upload Quotation]. [5. Create Shared Link] will automatically create a shared link to the quote file. Finally, [6. Email to Customer] will send an email with the shared link to the customer.

    Setting up automated items

    Create a folder in Box in advance where the files will be uploaded. In the “C3: The folder ID that files will be uploaded” field of [4. Upload quotation] set the URL of the created folder (the blue part below).

    https://example.app.box.com/folder/xxxxxxxxxxx

    The following figure shows an image of sales staff creating a quotation and finally sending an email to the customer with a URL (shared link) to view the quotation.

    Quote Approval Workflow

    Summary

    We introduced how to build a system in which files are automatically uploaded to Box cloud storage and a shared link is created for the file.

    The following processes have been automated.

    • An approved quote file is uploaded to Box
    • A shared link is created for the quote file
    • An email with the shared link is sent to the customer

    This automation reduces the time and effort required to upload files, set up shared links, and send e-mails to customers. In addition, the following errors are also prevented compared to doing these things manually.

    • Forgotten or delayed file uploads
    • Incorrect file upload location
    • Failure to set up shared links
    • Incorrect settings for shared links (expiration date, password)
    • Errors in the address or body of an email

    By using the automation items provided in Questetra BPM Suite, a no-code development platform used for automation, you can build a system in which files are automatically uploaded to Box and shared links are automatically created, even if you have no knowledge or experience with Box’s API (Application Programming Interface).

    Questetra BPM Suite is available for a 60-day free trial. If you are interested, please apply from the following link.

  • 業務プロセスの「定義」とは?

    業務プロセスの「定義」とは?

    業務プロセスを定義することは、業務を効率化し、改善していく上で欠かせない作業です。しかし、「業務プロセス」という言葉には曖昧なところがあり、人によって解釈が異なる場合があるのも実情です。そこで本稿では、まず

    • 業務プロセスという言葉の意味

    を定義して解説し、そこから

    • 業務プロセスを定義する

    という活動と、そうした作業に「ワークフロー製品を用いるメリット」について述べていきます。

    業務プロセスとは何か?

    業務プロセスは「仕事の流れ」や「手順」と説明されることが多いようです。しかし、これだけでは説明不足かもしれません。そこで、仕事を「電車」に、業務プロセスを電車が走る「路線」に例えてみましょう。路線上に存在する各駅は、そこで処理されるべき「タスク(工程)」です。たとえば、「作業を依頼する」という最もシンプルな業務プロセスでも、そこには、

    • 作業を依頼する
    • 依頼を受けた人が作業を遂行し、作業の完了を報告する
    • 依頼した人が作業や成果物の内容を確認する

    といった複数のタスクが含まれています。業務のスタートからゴールまで、電車(仕事)が設計した道筋をきちんと通るように、駅(タスク)をつないでいったものが路線(業務プロセス)といえます。

    では「業務フロー」って何? 業務プロセスを「定義する」

    しかし、誰もが業務プロセスの全体を把握して仕事をしているわけではありません。業種にもよりますが、業務プロセスについて無自覚なまま仕事をしているケースも多いでしょう。こうしたケースでは、たとえば、

    • いま仕事がどのような段階にあるのか?
    • どこで業務が停滞しているのか?
    • 仕事がどのように始まり、どのように完了するのか?

    といったことがわかりづらく、それがミスや二度手間、業務の遅れなどの問題につながる可能性もあります。そこで、誰もがわかりやすい形に業務プロセスを「定義する」ことが必要となってきます。業務プロセスの定義にはさまざまな方法がありますが、代表的なのは業務の流れや手順を図に描くことです。これが一般的に「業務フロー図」と呼ばれるものです。「業務プロセス図」も同じ意味の言葉ですね。

    つまり、業務プロセスを「定義する」とは、業務プロセスを「可視化すること」といえます。

    <「作業依頼」のワークフローサンプル>

    業務プロセスを定義するメリット

    それでは、業務プロセスを定義(可視化)すると、いったいどのような「いいこと」があるのでしょうか?
    「業務フロー図」を描く大きなメリットとしては、まず、

    • 業務プロセスを把握・共有しやすくなる

    ことが挙げられます。具体的には業務のスタートとゴール、「いつ・誰が・どんな順番で・どのような仕事をするのか」といったことが、図を描くことによってひと目でわかるようになり、業務の全体を俯瞰して見られるようになります。わかりやすく図式化されていれば、共有も簡単ですね。また、ワークフロー製品(以下、ワークフロー)ではタスクの処理にかかった時間や、メンバがどんな仕事を抱えているかも一目瞭然となるため、

    • 仕事の滞留状況
    • 仕事が滞留するポイント(ボトルネック)
    • 各人にかかっている負荷の状況

    なども把握しやすくなるでしょう。「仕事の流れ」を把握できると、そこに潜む課題や問題もあぶり出しやすくなるということですね。これは業務の品質や手順を改善し、効率化していく上でとても重要なポイントです。

    業務プロセス定義をサポートするワークフロー

    さて、業務プロセスを定義(可視化)し、上の項で述べたような業務改善活動をおこなう上で強い味方となるのが「ワークフロー」です。たしかに、紙とペンがあれば業務フロー図は作成できますし、オフィスのどこか目立つ場所に貼っておけば、業務プロセスは共有できるかもしれません。しかし、プロセスを変更するたびに図を描きなおすのは手間がかかりますし、紙のフロー図で業務の進捗状況を把握・共有するには別な工夫も必要です。

    こうした問題をまとめて解決してくれるのがワークフローです。

    ワークフローを使用すると、パソコン上で簡単に業務を可視化できるだけでなく、作成したフロー図に沿って、業務を自動で進行させられます。また、プロセスの修正・更新や共有も迅速におこなえます。ワークフローは、業務プロセスの定義を簡単におこなえるようにして、業務の自動化や効率化といった業務改善活動をサポートするソフトウェアといえるでしょう。

    Questetra BPM Suite で業務プロセスを定義してみよう

    Questetra BPM Suite はクラウド型のワークフローです。ワークフローのメリットについては上の項でも述べましたが、クラウド型はオフィスと同じシステムにどこからでも簡単にアクセスして仕事ができるのが強みです。自宅からでも通勤中の車内からでも、定義されたプロセスにアクセスして業務を進められるので、テレワークにも適しています。

    ワークフローや BPM ツールといったソフトウェアの多くは、サーバへのセットアップなど利用するまでの準備が大変ですが、Questetra BPM Suite はお申し込み後すぐにご利用できるのもポイントです。また、さまざまな業務に応用できるテンプレートも豊富に用意されているため、気軽に業務プロセス定義にチャレンジすることができます。

    無料でスタートできる Questetra BPM Suite を、この機会にぜひお試しください。

  • Recommendation for Automation – Box File Upload

    Recommendation for Automation – Box File Upload

    Hi there!

    I believe that many companies are using Box for cloud storage. In particular, many companies may have migrated their internal file server system to Box in order to establish a remote work system during the COVID pandemic.

    In this article, we will show you how to create a system in which files are automatically uploaded to the Box folder when a person does something particular.

    40No-Code Development Platform Questetra BPM Suite

    The cloud-based no-code development platform Questetra BPM Suite is used to automate operations.

    In Questetra BPM Suite a business system is constructed through the creation of workflow diagrams. In the constructed system, business data is not only digitized, the system also automates the transfer of business data between people, as well as performing text conversion, numerical calculations, email transmission, etc. Furthermore, data integration to other cloud services can also be automated.

    No-Code Development Platform Questetra BPM Suite Overview

    Such automation is achieved by placing items in the workflow diagram that will be automatically processed in some way at the desired time. For example, when a contact person enters a response to an inquiry, the inquiry details and the response can be automatically appended to a Google Sheet.

    Various automation items are available in Questetra BPM Suite. By using these items you can automate your business processes easily (with no code).

    Box Cloud Storage Service File Upload

    Box is a cloud storage service for businesses that allows users to store files of any format over the Internet. 97,000 companies use Box and 68% of Fortune 500 companies use it.

    The automation items provided in the Questetra BPM Suite introduced in the previous section are available for Box. (v13.3.0)

    • Box: Upload File
    • Box: Copy File
    • Box: Move File
    • Box: Create Shared Link to File
    • Box: Delete Shared Link of File
    • Box: Delete File
    • Box: Download File
    • Box: Create Folder
    • Box: Search Folder
    • Box: Create Shared Link to Folder
    • Box: Delete Shared Link of Folder
    • Box: Delete Folder
    • Box: Add Collaboration
    • Box: Delete Collaboration

    The mechanism we will create in the next section will use [Box: Upload File] (shown above in bold).

    Upload Image Files Automatically After Review

    The following operations will be systematized using Questetra BPM Suite.

    • A client who needs some images, such as a member of the marketing department, requests the production of the images.
    • The image production team’s staff produces images based on the request. The completed image is attached.
    • The reviewer checks the image and decides whether it is ok or not.
    • The image is uploaded to the Box and an email with the URL of the image is sent to the client.

    The last two steps, uploading the image to Box and sending the image URL by e-mail (in bold), are handled automatically.

    First, we will create such a workflow diagram. (Constructed with Questetra BPM Suite below.)

    Image Production Workflow Diagram

    The following four processes in the workflow diagram are processes that are handled by users. (Items in blue squares)

    • 1. Image production request (by production requestor)
    • 2. Image production (by production staff)
    • 3. Review (by reviewer)
    • 4. Feedback response (by production staff)

    If the image is OK’d at the [3. Review] step, the completed image is automatically uploaded to the Box at the gray item [5. Upload to Box]. The image URL will then be automatically sent to the client via email using the round item [6. Image Completion Report Mail].

    Setting up Automated Items

    Create a folder in Box in advance to which files will be uploaded. Set the part of the URL of the created folder (the blue part shown below) to “C3: The folder ID that files will be uploaded” in [5. Upload to Box].

    https://example.app.box.com/folder/xxxxxxxxxxx

    The following image shows how the image attached at the [2. Image Production] step will be uploaded to Box.

    Automated Image Production Operations

    Summary

    We showed how to build a system in which files are automatically uploaded to Box cloud storage.

    This time we have automated the following processes:

    • When the reviewer OKs the produced image, it is uploaded to Box.
    • The URL of the uploaded image is sent via email

    This automation reduces the time and effort of uploading files and sending e-mails to requesters. In addition, the following errors are prevented.

    • Forgetting to upload a file
    • Uploading files to the wrong location
    • Incorrect email address or body

    By using the automation items provided in Questetra BPM Suite, the no-code development platform used for this automation, you can build a system in which files are automatically uploaded to Box without any knowledge or experience with Box’s API (Application Programming Interface).

    Questetra BPM Suite is available on a 60-day free trial basis. If you are interested, please apply from the following link.

    There are many more possibilities for automation, but that’s all we’ve got time for today!

  • How to Automate WordPress Posts with No Code

    How to Automate WordPress Posts with No Code

    Many companies use WordPress to create and update their corporate websites and product/service websites.

    This time, we would like to introduce a way to automate part of the WordPress posting and page posting process to save your time and effort.

    How to Automate Posting to WordPress

    Cloud Service Tools to Prepare

    The tools we will use are WordPress and Questetra BPM Suite.

    Questetra BPM Suite is a business system platform that allows you to build a business system with no code. The steps on the workflow diagram are processed in the order they are placed on the workflow diagram.

    How Drafts are Automatically Created

    Set up the information of the site you want to submit articles to Questetra BPM Suite, such as the information of the site and the post title, the content of the post. Questetra BPM Suite will send a signal to automatically create a draft article in WordPress based on the settings information.

    A draft post is automatically created in WordPress and information such as the URL of the draft post is sent to Questetra BPM Suite.

    How it is Submitted to WordPress

    Below is a workflow diagram depicting the process of getting a draft posted to WordPress, using an automated processing item that will automatically post the draft to WordPress.

    WordPress Article Submission workflow diagram

    Specifically, posting to WordPress is completed in the following order

    1. Human Task: Set the title/article body/excerpt/post type (post/page), etc.
    2. Automatic processing items: A draft is automatically created in WordPress based on the information set in 1.
    3. Human Task: Check the draft created in WordPress and publish it (click the [Post] button when completed).

    By adopting this business process, all the contributor has to do is fill in the required fields on the input form as shown in the figure below, check the completed draft, and click the “Submit” button. This simplifies the submission process and saves labor.


    Image of the input form for the Input Submission Details process

    ※ Input form items can be created/configured for each process.

    How to Utilize it in Business Processes

    The main feature of Questetra BPM Suite is that it can be used in organizations involving multiple people/multiple departments.

    When creating or updating a website, especially a corporate website or a product page, it is necessary to post accurate information. Questetra BPM Suite helps to realize such a cross-functional business process within a company.

    In addition, Questetra BPM Suite allows the use of automated items in business processes involving multiple people/departments. In the workflow diagram that you create you can set up both processes that are handled by humans (e.g. creating a post, checking the content, etc.) and processes that are handled by the system (e.g. items that automatically create a draft of an article). This makes it possible to improve efficiency and save labor even in operations involving organizations.

    The workflow diagram below illustrates the use of an automated item in which draft articles are automatically added to WordPress for a business process in an organization.

    The specific process treatment flow is as follows

    1. Human Task: Input the title/article body/excerpt/post type (post/page), etc.
    2. Human Task: Check the contents set in 1. If any modification is necessary, it is sent back to be corrected.
    3. Automatic Task: A draft is automatically created and added to WordPress based on the information set in 1.
    4. Human Task: Check the draft created in WordPress, and publish it (click the [Post] button when completed).
    5. Human Task: Check the posted content. If it needs to be revised, it is sent back to be revised.

    Thus, with Questetra BPM Suite, drafts are automatically created and added to WordPress, which makes your work more efficient by shortening your work time.

    In addition, irregularities in work can be prevented because work can proceed according to the workflow diagram. In addition to this, it is also possible to improve the quality of work and reduce errors by including a checking process in the workflow.

    If you are interested please give it a try.

  • オジサン世代向け GA4 Conversion 概説

    オジサン世代向け GA4 Conversion 概説

    ◆ Q1. コンバージョンは Event?

    GA4 時代の「操作ログ」は、(”PageView” ではなく)、全て “Event” という単位で記録されるらしい。  と、いうことは、、、コンバージョンも “Event” なの?

    A1. コンバージョンも “Event” です

    GA4 の「コンバージョン Event」は、既存の Events 定義の中から指定されます。「Conversion というランクに格付けされた Event」と理解しても良いと思います(GA4 における制限:30個)。

    具体的には、(多くの会社では)、

    • 購入した
    • 資料請求した
    • 体験版を申し込んだ

    といった Event が「コンバージョン」として格付けされます。

    • [GA4] コンバージョン イベントのセットアップと管理
      https://support.google.com/analytics/answer/9267568
      コンバージョンを測定するには、ビジネスにとって最も重要なイベントを選択し、コンバージョン イベントとして設定します。

    ちなみに、”購入イベント” (←イベント名が purchase となっている Event)だけは、自動的に「コンバージョン Event」として認識(格付け)されます。そして[購入の可能性]や[予測収益]や「生涯顧客価値」(LTV)の予測モデルに活用されます。イベント名 purchase は、ある種の “予約語” と言っても良いと思います。

    Conversion / Convert には【変換】や【転換】といった意味があります。(野球の世界なら「内野から外野へ Convert された」、パソコンの世界なら「JPEG から PNG に Convert した」など)。ビジネスの世界においては、「見込顧客を【変化】させた」や「見込顧客を【改宗】させた」といったニュアンスで使われています。大量に記録される Events の中で、どの Event を「コンバージョン」と見なすべきなのか?、を考えるコトは、容易なことではありません。

    ga4 Events and Conversions

    ◆ Q2. コンバージョンは、どう設定するの?

    Google アナリティクスで「コンバージョン」を定義するのはタイヘンなの? プログラミング知識が必要だったりするの??

    A2. “GA4-UI” もしくは “GTM” で実装します

    大まかな手順は、以下の2ステップです。

    • 1. Event を作る
    • 2. Conversion マークを付ける(←格付けする)

    たとえば “thank_you_conversion” というアリガチな「コンバージョン Event」を設定したい場合は、まず、次のような設定で新しい Event を作成します。

    • event_name: 次と等しい page_view
    • page_location: 次を含む thank-you.html

    これらは Event page_view のサブセット(←パラメータの値で絞り込んでいるだけ)です。このような場合、Google アナリティクスの管理画面(GA4 UI)で作成することができます。コーディング知識は全く必要ありません。(追加の学習コストは不要)

    サイトのアクセス状況に応じて「Shareミス対策」や「Botトラフィック対策」などの工夫が必要になるかも知れません。(例: page_referrer 次で始まる "https://example.com/"

    一方、「あらかじめ定義されている Events」(全11種)のサブセットにはならないような Custom Event (Conversion Event) は GTM で作成します。たとえば「XMLファイルの click」という Event は “全11種” では、効率良く捕捉できていないため、”GTM での作成” を検討することになります。コーディング知識は必要ありませんが、追加の学習コストが必要です(トリガー/タグ/ワークスペースといった仕組みについて要学習)。

    • Web Events
      • page_view
      • user_engagement (10s,,,)
      • scroll
      • session_start
      • first_visit
      • file_download (pdf,xlsx,,,)
        • ※ Event file_download では「ファイル拡張子」が対象外です
        • (.xml は全くトリガーされません)pdf|xlsx?|docx?|txt|rtf|csv|exe|key|…
      • click (outbound link)
        • ※ Event click では「アウトバウンド Link」に限定されてしまいます。
        • (クロスドメイン測定ドメインの外へのLink)
      • view_search_results
      • video_complete
      • video_progress
      • video_start

    Google アナリティクスのマニュアルに『新しいイベントは、初めてトリガーされてからしばらくの間、表には表示されません』と記載されているように、GA4 の[設定]メニューにある[イベント]はナカナカ更新されません(202205現在)。Custom Events は、別途 Google Sheets などで管理した方が良いかも知れません。

    Custom Events via GTM

    ◆ Q3. コンバージョンの命名規則は?

    「各部門KPIのコンバージョン化」や「マイクロ・コンバージョンの追加」など、、、コンバージョンは上限の30個まで作ってしまいそうダ…。コンバージョンやイベントに、命名規則(流儀)とか、あるの?

    A3. 自前実装時も既定の名前にすべき場合があります

    「Googleが推奨するイベント名」に準拠することが大切です。

    Conversion Events は原則、「Events の3分類」を継承し、以下の 1.2.3. のいずれかに該当します。そして、この中の「2.推奨イベント」に該当する場合は、purchasesign_up といった既定の名前を使う必要があります。

    • (0. 自動収集イベント / Automatically collected events)
    • 1. 測定機能の強化イベント / Enhanced measurement events
    • 2.[要実装]推奨イベント / Recommended events
    • 3.[要実装]カスタム イベント / Custom events

    たしかに「2.推奨イベント」(と「3.カスタム イベント」)は、独自実装するので自社ローカルな名前を付けたくなるのですが、、、後々の「レポート生成」や「予測モデル活用」に配慮し “推奨名” (既定の名前)で命名します。

    • [GA4] イベントについて
      • https://support.google.com/analytics/answer/9322688
      • 「自動収集イベント/測定機能の強化イベント」は、コードを追加しなくても収集できます。より高度なデータ収集が必要な場合は、「推奨イベント」や「カスタム イベント」をコードに追加します。
    • [GA4] 自動的に収集されるイベント
      • https://support.google.com/analytics/answer/9234069
      • …基本的な操作によってトリガーされたイベントは、自動的に収集されます…、これらのイベントを収集するコードを追加で記述する必要はありません。
    • [GA4] 測定機能の強化イベント
    • [GA4] 推奨イベント
      • https://support.google.com/analytics/answer/9267735
      • より有益なレポートの生成に加え、新たな機能と動作の測定を行うことができます。…すべての業種のすべてのお客様におすすめします。
        • ad_impression
        • earn_virtual_currency
        • join_group
        • login
        • purchase
        • refund
        • search
        • select_content
        • share
        • sign_up
        • spend_virtual_currency
        • tutorial_begin
        • tutorial_complete

    なお、「3.カスタム イベント」に該当する Conversion Event も、長期利用に耐える Event name (≒イベント種類)にしたいところです。

    無計画に命名すると、”User が何を達成したのか”(≒「見込顧客をどう【変化】させたのか)が分からなくなり、運用・保守・追加開発(デベロッパー エクスペリエンス)がスムーズに進められません。一般的な命名アイデアとしては、

    • {Resource}_{UserAction}
    • {OwnerDiv}_{BusinessProcess}
    • など

    が挙げられます。

    極端な話、、、たとえ自社サイトが purchasesign_up と無縁なサイトだったとしても、サイト訪問者に期待する Event シナリオ(カスタマージャーニー)を考察し、「仮想的な purchase」や「仮想的な sign_up」を設定すべきなのだと思います。あるいは(もっと言えば)、、、「tutorial_begin / tutorial_complete を体験できるサイト」(orアプリ)の追加(への改変)を検討すべきなのだと思います。

    ◆ Q4. オーディエンスって何?

    Google アナリティクスが「Event 単位で記録されるようになった」ということは “オーディエンスの考え方” も大きく変わったんだろうね。 “GA4 オーディエンス” も、ちゃんと設定した方がイイ?

    A4. 最先端の顧客グルーピング機能です

    GA4 の計測単位である「Event」を、あえて違う表現で(掘り下げて)説明するなら、「ユーザの操作」(user’s interaction/activity)と言うことができます。 (⇒ UA 時代の「セッション内の PageView」とは対照的です。)

    しかも、そのユーザ操作は「デバイス横断的に計測される」という特徴があります。 (⇒それでいて「プライバシー配慮」〔GDPR/CCPA準拠〕って、スバラシイ。)

    ユーザのグループ化機能(セグメント化機能)である[オーディエンス]は是非とも設定しておきたいところです。(GA4 における制限:100個)

    とりあえずは、「Daily Active Users 数」や「Paid Customers 数」といった “アリガチな実績値” (≒業界標準の計測指標)は設定すべきなのでしょう。加えて、”各部署のKPIに沿ったセグメント” を設定するのが良いと思います。(オーディエンス規模の目安は各週において1000人程度が出入りするくらいが最適のようです)

    たとえば、『「XMLファイルの click」を3回操作したユーザたち』というアリガチな[オーディエンス]を設定したい場合は、以下の様な設定になります。

    • Sequence 1
      • Step 1: Across all sessions (全セッション)
        • Event: wpSupportTemplates_clickQar
        • Event Parameter: (null)
      • Step 2: Across all sessions (全セッション)
        • Event: wpSupportTemplates_clickQar
        • Event Parameter: (null)
      • Step 3: Across all sessions (全セッション)
        • Event: wpSupportTemplates_clickQar
        • Event Parameter: (null)

    あるいは、『サポートPageを2回以上見た日本ユーザたち』という[オーディエンス]を設定したい場合は、以下のような設定になります。

    • Condition Group:
      • Geography, Country ID (地域, 国ID):
      • filter: exactly matches (完全一致) JP
    • Sequence 1
      • Step 1: Across all sessions (全セッション)
        • Event: page_view
        • parameter: page_location begins with (先頭が一致) https://support.questetra.com/
      • Step 2: Across all sessions (全セッション)
        • Event: page_view
        • parameter: page_location begins with (先頭が一致) https://support.questetra.com/

    なお “オーディエンスへの追加” を Events として登録することも可能です。さらには Conversion Events として登録することも可能です。(Audience-trigger Events)

    通常の Events は発生時パラメータだけで判定されますが、”Audience-trigger Events” はサーバサイドで判定されます。これは「非常に複雑な Events を実装できる」ということも意味します。 GA4 を使いこなす上で、非常に重要な機能と言えるでしょう。(「最後のイベントのメタデータが、トリガーされたイベントにコピーされる」という仕様が、少し使いづらいかも知れません。)

    ちなみに、デフォルトで “購入者/Purchasers” という特別なオーディエンスがセットされています。ここにも GA4 が Event purchase を重要視していることが表れているように思います。

    正直なトコ、2022年5月現在、この「オーディエンスTriggers」には未完成な印象を感じます。マニュアル表記が “インターフェース” (≒仕様)と異なるケースも多く、また、解決策(パラメータ値のセットや追加等)が明示されていないケースも少なくありません。
    ◇オーディエンスのメンバーシップが更新されたときに追加のイベントを作成する(1 日 1 回まで)
    →”オーディエンスのメンバーシップが更新されると追加のイベントがログに記録されます”
    ◇Create an additional event (up to one per day) when the audience membership refreshes
    →”Log an additional event when audience membership refreshes”
    とは言うものの「オーディエンスTrigger (Events)」は、デキルコトが飛躍的に増える、とても魅力的な機能です。今後の仕様推移を見守りたいと思います。

    Audience-trigger Events

    ◆追伸

    結局のところ、新しい[GA4プロパティ]は、「日々是精進」「習うより慣れよ」です。筆者自身も、コツコツ改善していこうと考えています。 

    CM: 集計値取得業務の自動化

    ところで、「Google Analytics 集計結果の取得を自動化したい」と考えるのは、イマドキ当然です。

    クラウド型ワークフロー『Questetra BPM Suite』なら、ワークフロー設定内に “自動工程” を配置しておくと、日々のデータ取得が自動化されます。 GA4プロパティ対応の自動工程は、どんどん随時追加していく予定です。 (←もし、ご要望等あれば問い合わせフォームよりメッセージください。)

  • オジサン世代向け GA4 概説

    オジサン世代向け GA4 概説

    「GA4」とはナンダ? “Google アナリティクス” は、どう変わったのだ? 報道記事を読んでも、基本的なことが理解できていないので「読解」できない。だれかに「移行させる」にしても、どう指示を出したら良いものか…。 とお考えのアナタ(オジサン世代)のために「GA4の概要」をまとめてみました。

    ◆ Q1. ちなみにタグマネージャーって何?

    『Google Analytics』ならタマに使うから、よく知っている。Webサイトへのアクセスが “トラッキング” される仕組みだ。そう言えば昔は、サーバにログインして “access_log” をゴニョゴニョ〔grep uniq ときどき awk〕してたっけ…。だから “Urchin” (あーちん)が登場した時〔2000年頃〕は、ホント度肝を抜かれた。懐かしい。

    ところで、、、「タグマネージャー」ってナニ??

    A1. 平たく言えば「タグ埋め込み管理システム」です。

    HTML を書き換えることなく、さまざまな「タグ」(Tracking tag)〔←小さなプログラム〕を追加できます。”計測タグ” を HTML に埋め込む作業が不要になるだけでなく、様々な “計測タグ” をいつでもいくつでも、追加・変更できるようになります。

    具体的には2012年、『Google Tag Manager』というサービスが誕生しました。各Webページには「GTMタグ」(親)という “ハコ”(←[コンテナ])だけを用意しておきます。そして “ナカミ” である各「計測タグ」(子)は、Google Tag Manager(GTM)側によってコントロールします。一般には「タグ管理システム」と呼ばれます。

    たとえて言えば、「ビル内の “全ての部屋の電灯” を管理室でコントロールできるようになった!」みたいな感じでしょうか? あるいは「”var intX1, intX2, …;” と個別宣言していたデータを “var arrX” と配列宣言したので詰め込み放題!」みたいな感じかも知れません?!? 誤解を恐れずに真正直に言うなら、「バックドアを作った!」みたいな感じ、です(爆)!
    (バックドア: 正規の手続きを踏まずに内部に入ることが可能な侵入口 by Wikipedia) https://w.wiki/4xbC

    ◆ Q2. 計測や分析はどう変わったの?

    『Google Analytics』は、2020年に大々的にリニューアルされたらしい。そして2023年には強制的に移行させられるらしい。ウチも『ユニバーサルアナリティクスプロパティ』というバージョンから、『Googleアナリティクス4プロパティ』というバージョンになるらしい。”第四世代” という意味くらいまでは…。

    ていうか、スマホアプリの操作ログまで収集できるって、ほんとスゴイ! でも、どうやって収集してるんだ?
    (どうでもイイが、ネーミングの一貫性が無さすぎるトコ…、気に入らん…)

    A2. “Pageview” から卒業することになります。

    操作ログを送信する “計測タグ” (←小さなプログラム)は大きく進化してきました。「ブラウザ進化にあわせて進化してきた」と言っても良いと思います。 具体的には “urchin.js”、 “ga.js”(2007)、 “analytics.js”(2013)、 “gtag.js”(2017)です。 しかし一方で、Analytics 側のログ格納方法やログ分析方法は【Pageview ベース】という点において、変化はありませんでした。

    2020年に登場した『Googleアナリティクス4プロパティ』(GA4)では【Event ベース】に変わりました。要するに、「ページを表示させた」(page_view)だけでなく、「スクロールさせた」(scroll)、「ダウンロードした」(file_download)、「じっくり見た」(user_engagement)といった様々な Event が同列に格納されるようになります。〔計測タグ: “gtag.js” のみ〕

    この変化は、「デバイスの多様化(≒スマホの普及)にあわせて進化した」と言っても良いと思います〔ベータ版時代は『Google Analytics App+Web property』と呼ばれていた〕。 なお “格納庫” に保存データという観点でも、「GA4 Property」とそれまでの「UA Property」に互換性はありません。

    ◆ Q3. データの見方が難しくない?

    新しい『Google Analytics』〔GA4プロパティ〕にログインしてみたけど、メニューは少ないし、グラフも見づらいし、ヨクワカラナイ。

    いろいろ設定しなきゃダメなんだろうけど、[パラメータ]ってナニ? [オーディエンス]ってナニ? 肝心の[コンバージョン]はドコ?

    A3. まずは自社が注目すべき Event を決める必要があります。

    GA4プロパティには「ありとあらゆるユーザ操作」(Event)が記録されるようになりました。つまり「分析の自由度が増した」と言えます。しかし、裏を返せば「分析の難易度も増した」とも言えます。

    記録される Event は、その種類だけでも11種もあります。(←Web に限っています)〔202204時点〕

    • click (outbound link)
    • file_download (pdf,xlsx,docx,,,)
    • first_visit
    • page_view
    • scroll
    • session_start
    • user_engagement
    • video_complete
    • video_progress
    • video_start
    • view_search_results

    どんな Event が記録されているのかが分かってくれば、「自社にとって計測すべき Event」について、再考する必要が出てくると思います。つまり、「ページ遷移」だけを考えるのではなく、加えて「どこどこページにおける〇〇イベント」といった具合に、モニタリングしたい Event を再確認する作業が必要になってくると思います。イベント種類([イベント名]←イベントClass)を増やすことになるかも知れません。

    [GA4プロパティ]の利用開始時には、基本的な設定〔データ保持期間・計測除外IP・クロスドメイン〕も必要です。

    ◆ Q4. ディメンションと指標は健在なの?

    「分析」と言えば、”テーブル” だろ! Analytics の “テーブル” といえば[ディメンション]と[指標](メトリックス)だろ! まだ使えるの?

    ちなみに、[ディメンション]は『ページごとに』とか『地域ごとに』とか、いわゆる “ごとに系の軸” のコト! そして、[指標]は『PV数』とか『セッション数』とか、いわゆる “計測値系の軸” のコト! それくらいは知っている。

    A4. どちらのテーブル軸も進化しています。

    [ディメンション]〔Dimension(s)〕と[指標]〔Metric(s)〕を使って分析することに変わりはありません。

    『Dimension』は “配列型” であり、各値はいわゆる “A列” に〔≒縦方向に〕列挙されます。『指標』は “数値型” であり「Dimension の値」〔A列の値〕ごとに集計表示されます。 指示の例:「毎週、{pagePath} ごとの {screenPageViews} (の数)と {sessions} (の数)を計測しよう!」

    [UA プロパティ]の格納データは、Google Analytics が提供するテーブル軸によって分析されていました。具体的には、Dimension(s) として

    • “ga:pagePath” や
    • “ga:browser” や
    • “ga:country”

    など100種類ほど分析軸が用意され、一方 Metric(s) (指標)として

    • “ga:pageviews” や
    • “ga:uniquePageviews” や
    • “ga:sessions” や
    • “ga:newUsers”

    など50種類以上の計測値が用意されていました。 

    そして[GA4 プロパティ]の格納データも、あらかじめ用意されている Dimension(s)(150超)と Metric(s)(50超)で分析できます。

    Dimensions:

    • “pagePath”,
    • “browser”,
    • “country”,
    • “audienceName”,
    • “videoUrl”, …

    Metrics:

    • “screenPageViews”,
    • “screenPageViewsPerSession”,
    • “sessions”,
    • “newUsers”,
    • “activeUsers”,
    • “conversions”,
    • “eventValue”,
    • “totalRevenue”, …

    しかし[GA4 プロパティ]はさらに、分析軸や計測値を、任意に追加したり詳細化したりすることが可能です。「自社にとって必要な “軸” を考えること」は容易ではありません。 〔[カスタムディメンション]、[オーディエンス]、[カスタム指標]…〕

    UA Dimensions & Metrics Explorer

    GA4 Dimensions & Metrics Explorer (←ログインして利用することになります)

    なお、詳細なグラフやレポートの作成には、[Google データポータル](旧称[Google データスタジオ])や[Google BigQuery]の併用が必要になってくると言えます。

    ◆ 追伸(まとめ?)

    結局のところ、新しい[GA4プロパティ]も、「日々是精進」「習うより慣れよ」だと思います。(「ローマは一日にして成らず」とも言う)

    筆者自身も、コツコツ改善していこうと考えています。

    【追記:2022-05-12】 続編『GA4 Conversion 概説』も書いてみました。

    困った時は公式ドキュメントへ!

  • Questetra: No-Code development platform v14.0, Bulk Work Start Added

    Questetra: No-Code development platform v14.0, Bulk Work Start Added

    Reduces time and effort for entering data

    Original Japanese version

    Kyoto, Japan, Apr. 11th, 2022, Questetra, Inc., the global SaaS provider of Business Process Management (BPM), today announced that they have published the new version 14.0 of the No-Code development platform Questetra BPM Suite. The new version 14.0 allows the operator to start a large number of business cases IN BULK by uploading a business data file.

    As telework is promoted due to the influence of COVID-19, workflow systems that realize digitalization and visualization of business progress are attracting attention. In a common workflow system, the person in charge inputs business data one by one to start a business matter. Therefore, when starting multiple business items, it is necessary to enter data as many as the number of cases. The same was true for Questetra BPM Suite, which is classified as a workflow system.

    From the new version 14.0, the person in charge can start multiple business cases in bulk by uploading a file in which business data is recorded. In the fixed asset valuation, for example, if you upload the fixed asset list file, you can start the workflows for each fixed asset for which a valuation will be performed.

    Questetra BPM Suite

    Questetra BPM Suite is a No-Code development platform for realizing paperless and remote-working environments. You can develop a workflow system with No code by Dragging & Dropping the Step icons. It will help to realize on-site-led digitization, automation, and unmanned operation. This is a cloud SaaS service for ISO-certified companies, BPO contractors, and corporations who want to work on continuous process improvement.

    You can apply it to various business operations such as an Approval request flow, Document translation flow, Quality check process, and Invoice issuance process. Process owners of each Business Process can practice the Improvement of Business Processes little by little in daily work. (Examples of Business Flow Diagrams: https://questetra.zendesk.com/hc/en-us/articles/360012492211 )

    Business Issues Bulk Start

    When the person in charge uploads the business data list file created in the TSV (Tab Separated Values) format, business issues corresponding to the number of lines in the TSV can be started in a batch in the state in which the business data has been entered. You can also download the TSV file template corresponding to the Workflow App.

    Business Issues Bulk Start Operation Overview

    Other Improvements

    Google Drive: add sharing scope

    This new Service Task allows you to control the addition of sharing scopes for files and folders in Google Drive. For example, it will be possible to build a mechanism where once a draft of the in-house notification document is approved, it automatically sets the document that previously only had viewing permissions for the section so that viewing permission is given to the entire company (with the domain). *Available Editions: Advanced, Professional

    Embedding video on the Process Operating Form screen

    You can now embed HTML video tags in Process Operating Form screens. By showing the video of how to handle the Task on the Operating Form using the video tag, it is expected to reduce the cost of education for workers and reduce work mistakes.

    Displaying a list of Business Issues that have stagnated other than the human Tasks

    Previously, in the list of stagnant Business Issues (Heatmap function), only the human Tasks (*) in the workflow diagram could be displayed. From version 14.0, it is possible to display a list of stagnant Business Issues even for items other than human Tasks, such as a Step that waits for an HTTP request. *Steps to be handled by humans

    Ver. 14.0 Release Note: https://support.questetra.com/versions/version-140/

  • No-Code 開発基盤 v14.0、業務案件一括開始を追加

    No-Code 開発基盤 v14.0、業務案件一括開始を追加

    SaaSベンダーの株式会社クエステトラ(京都市、代表執行役 CEO 今村元一)は4月11日、No-Code 開発プラットフォーム 『Questetra BPM Suite』 の新バージョン14.0を公開しました。新バージョン14.0からは、担当者が業務データファイルをアップロードすることで、大量の業務案件を “一括” スタートできるようになります。

    コロナ禍の影響でテレワークが進む中、電子化や業務進捗の見える化を実現するワークフローシステムが注目されています。一般的なワークフローシステムでは、業務案件を開始する際、担当者は1件ずつ業務データを入力します。従って、複数の業務案件を開始する場合には、その件数分の入力が必要になります。ワークフローシステムに分類される『Questetra BPM Suite』も、この点について同様でした。

    新バージョン14.0からは、担当者は業務データが記録されたファイルをアップロードして、複数の業務案件を一括開始できるようになりました。例えば、固定資産の評価業務で、固定資産一覧ファイルをアップロードすると、それぞれの固定資産に対して評価が行われる業務案件を一括開始できます。

    Questetra BPM Suite とは

    『Questetra BPM Suite』は、ペーパーレス環境やリモートワーク環境を推進するための No-Code 開発プラットフォーム です。業務案件は業務フロー図に従ってコントロールされ、案件が人間工程に到達すれば担当者はアウトプットを求められます。また、案件が自動工程に到達した際には、「PDFの生成」や「クラウドストレージへの保存」といった既定の処理(サーバサイド処理)が自動的に行われます。(BPM: Business Process Management)

    「稟議承認フロー」「文書翻訳フロー」「品質チェックプロセス」「請求書発行プロセス」といった様々な業務に適用していただけます。各業務のプロセスオーナーは日々の業務の中で少しずつ「業務プロセスの改善」を実践できます。

    (業務フロー図サンプル: https://questetra.zendesk.com/hc/ja/articles/360012492211

    業務案件一括開始

    TSV(Tab Separated Values)で作成された業務データ一覧ファイルを、担当者がアップロードすると、行数分の業務案件を、業務データが入力された状態で、一括開始させられるようになりました。ワークフローアプリに応じた、TSVファイルのテンプレートをダウンロードすることもできます。

    その他の機能改良について

    Google ドライブ 共有範囲の追加

    自動処理工程を利用して、Google ドライブのファイルやフォルダについて共有範囲の追加をコントロールできるようになります。例えば、社内通達文書の原稿が承認されると、それまで部内でのみ閲覧許可されていた原稿が、全社(ドメイン)で閲覧許可されるように自動設定される仕組みを構築できるようになります。※対象エディション: Advanced, Professional

    工程処理フォーム画面に動画挿入

    工程処理フォーム画面に HTML の video タグを埋め込めるようになりました。video タグを利用して工程処理のマニュアル動画が表示されるように設定すると、作業者への教育コストの抑制や業務ミスの低減が期待されます。

    ヒューマン工程以外に滞留した業務案件の一覧表示

    従来、ワークフロー図において滞留した業務案件の一覧はヒューマン工程(※)でのみ表示可能でした(ヒートマップ機能)。バージョン14.0より、HTTPリクエストを待ち受けるアイテムなど、ヒューマン工程以外のアイテムでも、滞留している業務案件の一覧を表示させられるようになりました。※人に処理される工程

    詳細については、リリースノートを御参照ください。

  • 請求書発行と入金確認をノーコードで自動化する方法(  PayPal 編)

    請求書発行と入金確認をノーコードで自動化する方法( PayPal 編)

    企業の請求業務では、請求書の作成/送付や、入金確認に手間がかかりがちです。同記事では、これらの請求業務を自動化し、手間の軽減に加え、ミスを防止し、業務品質/効率を上げる方法をご紹介します。

    自動化に必要なツール

    請求業務の自動化に必要となるツール(クラウドサービス)は以下の2つです。

    • PayPal
    • Questetra BPM Suite

    PayPalとは?

    PayPal(ペイパル)とは、米国の決済代行サービスです。

    PayPalアカウント間の送金や決済が可能です。PayPalアカウントに、銀行口座(振替)やクレジットカード、デビットカードなど複数の決済サービスを紐づけられます。そのため、1つのアカウント(メールアドレスID/パスワード)で複数決済が可能です。

    Questetra BPM Suiteとは?

    Questetra BPM Suiteとは、業務システム開発プラットフォームです。

    ノーコード/ローコードで業務システム(ワークフローアプリ)を構築できます。複数部署/担当者が関わる様々な「業務プロセス」を電子化し自動化します。PayPalの他にも、以下のようなクラウドサービスとAPI連携し、各サービスの自動処理が可能です。

    • GoogleWorkspace
      • Googleドキュメント、Googleスプレッドシート、Googleスライド、Googleグループ、Googleドライブ、Googleカレンダー、Gmail
    • Microsoft 365
    • Box
    • kintone
    • Slack
    • WordPress
    • Stripe
    • Salesforce
    • Google BigQuery
    • Google Analytics
    • Google Fit
    • Google 翻訳
    • DeepL
    • AirTable
    • SendGrid
    • ChatWork
    • Typetalk
    • Backlog
    • Image-Charts
    • Zendesk Support

    など

    自動化の仕組み

    Questetra BPM Suiteに入力された※1 請求情報(メールアドレス/会社名/担当者名/請求金額/請求日など)をもとに、PayPal上で請求書の下書きが自動作成されます。(この際、Questetra BPM SuiteはPayPalに、請求情報を送信するとともに、請求書の下書きを作成させるシグナルを送ります)

    PayPal上で作成された請求書を請求先に送信するよう、Questetra BPM SuiteがPayPalに対してシグナルを送ります。

    Questetra BPM SuiteがPayPal上にある請求先※2 の支払い状況を取得します。

    ※1. 既に取得している情報を自動的に差しこむことも可能です。

    ※2. 本記事の自動化を実現するためには、請求先(支払者)がPayPalアカウントを持っている(作成する)必要があります。

    請求書の作成/送付と入金確認を自動化する方法

    Questetra BPM Suiteでは、以下の図のようなワークフロー図が業務システム(ワークフローアプリ)の設計図の役割を果たします。

    作成されたワークフロー図上には、人間が処理する工程と(システムにより)自動処理される工程が存在します。これらの工程は、開始工程から終了工程まで順番に処理されます。


    <PayPal自動請求>

    上の図は、「PayPal自動請求」のワークフロー図です。具体的な処理の流れは以下の通りです。

    1. 人が処理する工程:請求内容(請求先情報/請求金額/支払期日など、ワークフローアプリを作成した際に予め設定した項目)を入力します。
    1. 自動処理工程(PayPal請求書生成アイテム):1で入力した情報をもとに、PayPal上に請求書の下書きが自動生成されます。
    1. 自動処理工程(PayPal請求書送信アイテム):2で生成された請求書(請求メール)が請求先に自動送付されます。
    1. 自動処理工程(タイマーアイテム):1で入力された「支払期日」の翌日まで待機します。(設定した期間、同工程で待機します)
    1. 自動処理工程(PayPal支払状況確認アイテム):請求案件について、支払状況が自動的に取得されます。

    この様に、プロセス(開始工程から終了工程までタスクが遷移すること)が開始されると、請求情報を入力するだけで、請求書作成から請求書送付、入金確認までが自動化されます。

    請求業務を自動化する方法

    前項でご紹介したシンプルなワークフローアプリを応用すれば、実際の請求業務を自動化することが可能です。

    例えば、複数部署が関わり、部内での承認を含む請求業務においても、PayPalの自動処理アイテムを使うことで自動化できます。実際のサンプルワークフローアプリが、以下のサポートサイトで閲覧できます。

    この様に、Questetra BPM Suiteを使えば、様々な業務に対応した業務システムをノーコード/ローコードで構築できます。API連携されたクラウドサービスの自動処理も可能です。

    業務の電子化/自動化。一度、ご自身の手で試してみてはいかがでしょうか?

  • Introduced Update Date Choice system

    Introduced Update Date Choice system

    Original Japanese version

    Convenience improvement for Pre-renewal Verification

    Kyoto, Japan, Mar. 25th, 2022, Questetra, Inc., the global SaaS provider of Business Process Management (BPM), today announced that they are going to introduce updating schedule options for the cloud-based workflow, Questetra BPM Suite, on and after April the 1st.

    Conventionally;

    On the release date of the new version, all customers’ workflow platforms were updated. (Notice announced principally 2 weeks in advance)

    Hereafter (on and after April 1, 2022);

    • Workflow platforms for which [Rapid Update] is chosen will be updated on the release date of the new version
    • Workflow infrastructures for which [Scheduled Update] is selected will be updated approximately one month after the release date of the new version

    However, updates with a bug fix version (patch version) will be applied to all workflow platforms.

    Demands for Pre-verification

    In recent years, due to the declining workforce and COVID-19 effect, further improvement in work quality and productivity has been required. Many companies are actively pursuing business reforms that utilize IT to meet these demands.

    Specific examples include the automation of operations that realize labor-saving and unmanned operation, and the construction of a telework environment that includes the utilization of cloud services.

    Customers who are using Questetra BPM Suite are no exception to these efforts. In particular, Questetra BPM Suite is used for business automation and data linkage with multiple cloud services.

    There was a problem using Questetra BPM Suite, as the automatic processing did not work as expected due to the update, especially when the customer’s own automatic processing was set.

    Previously, the verification workflow platform (“Online Demo Platform”) which has no access restrictions was used to verify the new version. However, since it is also a workflow platform that anyone can access it was difficult to verify, for example, for scripts used in actual business. In addition, the update of the verification workflow platform to the new version was done only one week in advance of the customer’s platform update, and it was an environment where a sufficient verification period could not be taken.

    Based on this background, you will be able to choose the update to the major/minor version (*), either;

    • at the same time as the release of the new version [Rapid Update]
    • about one month after the release of the new version [Scheduled Update]

    This makes it easier to verify scripts used in actual business by separately subscribing to a workflow platform for verification and selecting [Rapid Update]. In addition, the period until the [Scheduled Update] is about one month, so you will be able to secure a sufficient verification period.

    * Version notation X.Y.Z (e.g. 13.2.1) means that X is the major version, Y is the minor version, and Z is the patch version. (Semantic versioning)

    Starting

    From the update to the new major version scheduled for April 2022.

    * This update is performed only with the workflow platform for verification of sales partners by [Rapid Update], and for the customer’s platforms, it will be performed by [Scheduled Update] about one month after [Rapid Update].