たとえば、Questetra BPM Suite を導入して受注決裁業務を自動化・ペーパーレス化したヴァイタル・インフォメーション株式会社の事例では、年間約500件ある申請に伴う紙の書類がなくなり、紙の印刷費用や保管スペースをカットできたとのこと。同事例ではほかにも、管理部門がおこなっていた保管用書類の印刷作業やファイリング作業がなくなり、業務時間を月間約20時間削減できたことなどが報告されています。
ちなみに、弊社が提供している Questetra BPM Suite はクラウド型のワークフローシステムです。
Box is a service that allows you to share files efficiently and securely within your organization, and one of the many things that make Box a great service is that it’s easy to share with people outside your organization.
This article will show you how to set up Box features that can be shared with people outside your organization automatically instead of manually.
1. Box Cloud Storage
Box is a cloud storage service for businesses. The Box case studies page lists over 100,000 customers and 67% are Fortune 500 companies (confirmed 2022-02-15).
Box makes it easy to share files and folders within an organization. In addition, you can share files and folders not only within the same organization, but also with people outside the organization.
In business, it is necessary to share files with people outside the organization in various ways, for example:
When submitting quotations or proposals to customers
Sharing requirement definitions and design files with contractors in a system development project
Preparing a folder to accept delivery of CAD files of drawings from clients
Box provides the functionality to fulfill such requirements.
Collaboration
Shared links
Both of the above two functions are used to share files and folders with people outside the organization. How are they used differently?
1-1. Difference Between Shared Links and Collaboration with Box
The difference between collaboration and shared links depends on the following:
Are you sharing with people outside your organization who use Box?
Are you sharing with people who are not using Box?
Collaboration allows you to share files and folders with people outside your organization who are using Box.
When using collaboration, enter the email addresses of external collaborators who have Box accounts using the “Share” feature for files and folders. At this time, you can specify permissions to the file or folder as follows.
File
Editor: Download, preview, share, and edit
Viewer: Download, preview, and share
Folder
Co-owners: Manage security, upload, download, preview, share, edit, and delete
Editor: Upload, download, preview, share, edit, and delete
Viewer Uploader: Upload, download, preview, share, and edit
Previewer Uploader: Upload and preview
Viewer: Download, preview, and Share
Previewer: Preview only
Uploader: Upload only
With low level permissions, you can only view files, but with high level permissions, you can do almost anything to that folder or file, including deleting and editing.
Box Collaboration Settings Screen
On the other hand, shared links allow you to share files and folders with people who are not using Box. Use the share function in the same way as for collaboration. At this time, you can specify the scope of sharing.
Sharing scope
People with the link: Everyone who knows the URL of the file or folder
Company users: Users who are currently using Box and are subject to the administration of Box.
Invited users only: collaborators invited by the collaboration feature
People specified in the sharing scope will be able to view and download the folders and files indicated by the shared links. However, they cannot edit, delete files, or upload files to a folder. Compared to collaboration, what you can do is limited.
If you select “People with the link” in the sharing scope there is a risk that if that URL is leaked it will be seen by people you do not want to see it. To reduce this risk, you can set an expiration date and a password.
Box Shared Link Settings Screen
Collaboration is suitable for projects such as system development, where the collaborator is given greater access to files and folders, and the project is carried out in close cooperation with the outsourcer.
Shared links are suitable for easily sharing files and folders, such as submitting quotations or requested documents, because they allow you to easily share files and folders with people who do not have a Box account.
1-2. Automated Collaboration and Shared Links
Setting up collaborations and shared links isn’t too difficult, but it can be a hassle. Confirming that they have been appropriately configured and sending guidance to the sharing recipients is time-consuming.
It is also necessary to remove collaboration and shared link settings, for example at the closing of a project. It is not good for security that internal folders and files continue to be shared with people outside the company without awareness.
To automate these tasks, Box provides APIs (Application Programming Interface).
Creating a mechanism (app or system) that utilizes these APIs can automate the aforementioned tasks, but it requires skills in programming. Even if you have the skills, it will take time to understand the API specifications and create the mechanism.
Questetra BPM Suite, introduced in the next section, provides automation items using the above API. By using these items, you will be able to build a mechanism to automate collaboration and shared link settings and to automatically remove these settings when the time comes, without any code.
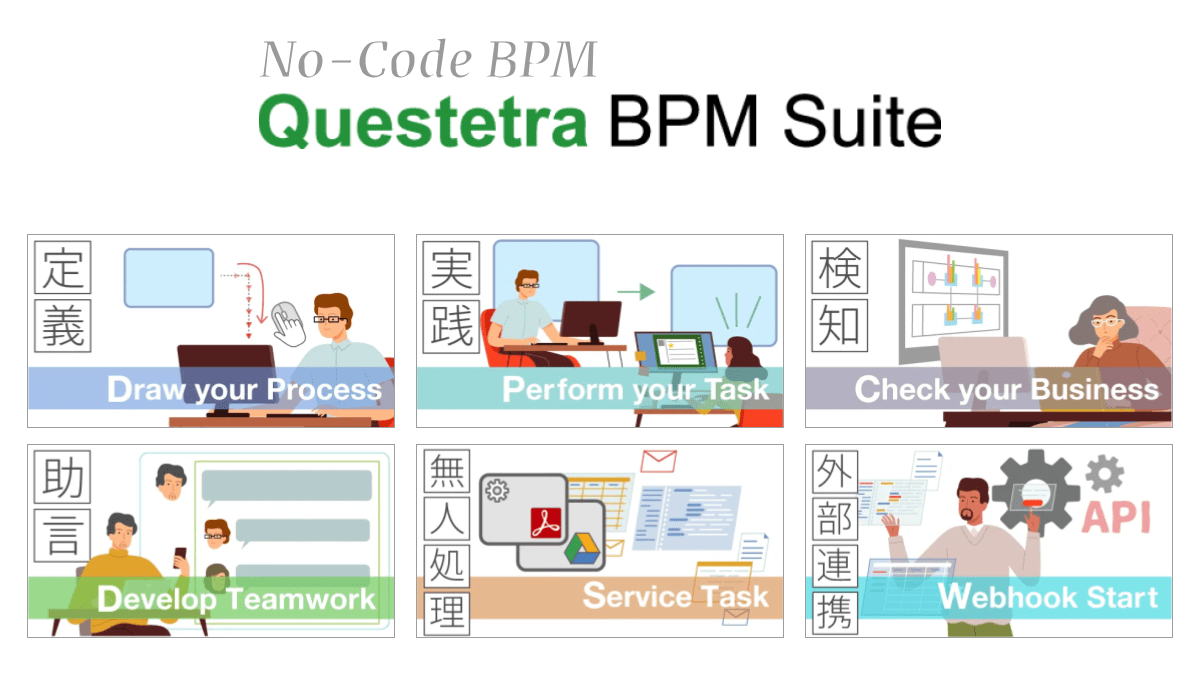
2. No-Code Cloud Development Platform Questetra BPM Suite
No-Code Cloud Development System Questetra BPM Suite is a cloud service provided by Questetra, Inc. and is used for in-house production of systems.
In Questetra BPM Suite, system development is performed using only a Web browser. The business system is built through the creation of workflow diagrams. In the constructed system, it is not only the business data that is digitized.
The system automates the transfer of business information from one person to another, as well as the analysis of numerical calculation data and the sending of formatted emails. Furthermore, data integration with other cloud services can also be automated.
No-Code Development Platform Questetra BPM Suite Overview
Automation is achieved by placing the items to be automatically processed in the workflow diagram at the point in time when you want to automate the process (e.g. when the Quality Control Manager approves an inspection report, the inspection report file is uploaded to Box).
Various automation items available in Questetra BPM Suite allow you to easily automate your business operations. (v13.3.0)
Box: Upload File
Box: Copy File
Box: Move File
Box: Create Shared Link to File
Box: Delete Shared Link of File
Box: Delete File
Box: Download File
Box: Create Folder
Box: Search Folder
Box: Create Shared Link to Folder
Box: Delete Shared Link of Folder
Box: Delete Folder
Box: Add Collaboration
Box: Delete Collaboration
The automation items shown in bold can be used to automate sharing with Box.
Examples of the use of automated items related to shared links can be found in the following articles.
Cloud Storage Sharing in Box includes features called Collaboration and Shared Links.
Collaboration enables sharing with people outside the organization who have Box accounts, and Shared Link enables sharing with people who do not have Box accounts.
Each must be used for different purposes, but the procedures related to setting up and deactivating them can be cumbersome. In addition, there are security issues that need to be handled reliably.
By using the automation items provided in the no-code development platform Questetra BPM Suite, you can build a system in which collaboration and setting/unsetting of shared links are handled automatically, even if you have no knowledge or experience with Box’s API (Application Programming Interface).
Questetra BPM Suite is available for a 60-day free trial. If you are interested, please apply from the following link.
This article will show you how to build a no-code system for sending emails with document files attached.
No-Code Development Platform Questetra BPM Suite
We will be using the cloud-based no-code development platform Questetra BPM Suite to automate operations.
In Questetra BPM Suite, you can develop a business system using only a web browser. The business system is built through the creation of workflow diagrams. In the constructed system, it is not only the business data that is digitized.
The system automates the transfer of business information between people, and also automates processes such as numerical calculations, data analysis and formatting, and email transmission. Furthermore, data integration with other cloud services can be automated.
No-Code Development Platform Questetra BPM Suite Overview
Such automation is achieved by placing items in the workflow diagram that will be automatically processed in some way at the desired time. For example, once the Quality Control Manager approves an inspection report, the report file is uploaded to Box.
Various automation items available in Questetra BPM Suite will allow you to automate your operations easily.
Box Cloud Storage File Download
Box is a cloud storage service for businesses. The Box case studies page lists over 100,000 customers and 67% are Fortune 500 companies (confirmed 2022-02-15).
The following automation items provided in the Questetra BPM Suite (v13.3.0) introduced in the previous section are related to Box.
Box: Upload File
Box: Copy File
Box: Move File
Box: Create Shared Link to File
Box: Delete Shared Link of File
Box: Delete File
Box: Download File
Box: Create Folder
Box: Search Folder
Box: Create Shared Link to Folder
Box: Delete Shared Link of Folder
Box: Delete Folder
Box: Add Collaboration
Box: Delete Collaboration
The mechanism we will create in the next section will use [Box: Download File] (shown above in bold).
Automated Attaching of Files to Emails in Response to Requests for Information
We will build a system in which the following processes are performed.
The person requesting the information enters their name and email address in the information request form.
The material/files prepared in Box are downloaded to Questetra BPM Suite.
An email with the document attached is sent to the person requesting the document.
Everything is handled automatically, except for the initial input of the name and email address by the person requesting the information.
First, we will create a workflow diagram of this operation. (The following is constructed with Questetra BPM Suite)
Workflow Diagram for Requesting Information
In this workflow, only the item circled in green on the far left, [1. Information Request Form] is processed by humans. Once the name and email address are entered here, the subsequent steps are processed in the following order.
In [2. Document Download], the document file saved in Box will be downloaded to Questetra BPM Suite.
In [3. Email to Requester], the downloaded file is attached to an email and sent to the requester.
Prepare file materials and set up automated itemsFrom requesting to receiving materials
Set the file ID of the document file saved in the Box in advance to “C2: File ID to download” in [2. Document Download]. The file ID of the document file is a part of the URL of the file (the blue part below).
https://example.app.box.com/file/xxxxxxxxxxxx
When a request for information is made, the requestor will be able to review the information in the file attached to the email they receive.
The difference from Part 1 is that the document file is attached to the email.
If the material file is large, Part 1 may be better. However, this time around the number of items used in the workflow diagram is smaller and requires less setup effort.
Furthermore, the recipient can check the contents of the attached file as soon as he opens the received email, depending on the email receiving software. The effort of the email recipient is also small.
This fully automated system reduces the time and effort required for attaching files compared to a manual process. In addition, it prevents mistakes such as forgetting to respond to a request, delay, sending an incorrect file, or misdirecting the email.
By using the automation items provided in Questetra BPM Suite, a no-code development platform used for automation, you can build a system in which files are automatically downloaded from Box and automatically attached, even if you have no knowledge or experience with Box’s API (Application Programming Interface).
Questetra BPM Suite is available on a 60-day free trial basis. If you are interested please apply from the following link.
In this article we will introduce how to build a system for handling document requests using Box. In the system we will build, when a name and email address are entered in the document request form, an email is sent to the requester with a URL to view the document file.
All processing after the receipt of a claim is automated, which significantly reduces labor and prevents errors.
No-Code Development Platform Questetra BPM Suite
We will be using the cloud-based no-code development platform Questetra BPM Suite to automate operations.
In Questetra BPM Suite, you can develop a business system using only a web browser. The business system is built through the creation of workflow diagrams. In the constructed system, it is not only the business data that is digitized. The system automates the transfer of business information between people, and also automates processes such as numerical calculations, data analysis and formatting, and email transmission. Furthermore, data integration with other cloud services can be automated.
No-Code Development Platform Questetra BPM Suite Overview
Such automation is achieved by placing items in the workflow diagram that will be automatically processed in some way at the desired time. For example, once the section manager approves a quotation, the quotation file is uploaded to Box.
By using the various automation items provided in Questetra BPM Suite, you can easily automate your business operations.
Box Cloud Storage File Copy
Box is a cloud storage service for businesses. The Box case studies page lists over 100,000 customers and 67% are Fortune 500 companies (confirmed 2022-02-15).
The following automation items provided in Questetra BPM Suite (v13.3.0) introduced in the previous section are related to Box.
Box: Upload File
Box: Copy File
Box: Move File
Box: Create Shared Link to File
Box: Delete Shared Link of File
Box: Delete File
Box: Download File
Box: Create Folder
Box: Search Folder
Box: Create Shared Link to Folder
Box: Delete Shared Link of Folder
Box: Delete Folder
Box: Add Collaboration
Box: Delete Collaboration
The mechanism we will create in the next section will use [Box: Copy File] and [Box: Create Shared Link to File] (shown above in bold).
Automated File Duplication in Response to Requests for Information
In this case, we will build a system in which the following processes will take place.
The person requesting the materials enters their name and email address on the request form.
The materials stored in Box are copied.
A shared link to the copied file is created.
An email with the shared link is sent to the person who requested the materials.
The entire process is automatic except for the initial entry of the name and email address by the requester.
First, we will create a workflow diagram of this operation. (The following is constructed with Questetra BPM Suite)
Prepare source files stored in Box
In this workflow, only the item highlighted in blue on the far left, “1. Information Request Form” is processed manually. Once the name and email address are entered here, the subsequent steps will be processed in the following order.
In [2. Copy Document] a source file that has been previously saved in Box will be copied.
In [3. Create Shared Link] a shared link to the duplicated file will be created. At this time, the expiration date of the link is also set.
In [4. Email to Requester] an email with the created shared link URL will be sent to the requester.
Prepare source files stored in BoxSetting up automated items [Copy Document] and [Create Shared Link].
Set the file ID of the source file saved in Box beforehand as the initial value for the Data Item [Source File ID]. The file ID of the source file is a part of the URL of the file (the blue part below).
https://example.app.box.com/file/xxxxxxxxxxxx
Also, create a folder in advance where the duplicated files will be saved. Set a part of the URL of the created folder (the blue part below) to “C3: Folder ID to store” in [2. Copy Document]. (Similar to the file ID, right?)
https://example.app.box.com/folder/xxxxxxxxxxxx
In [3. Create Shared Link] a deadline for the shared link is set. In this case, we will set the deadline to one month after the application. Select [After a month of process start time] as the default value for the Data Item [Shared Link Expiry Date].
Once the request is made, the requester can review the materials by clicking on the URL in the email received.
Setting up email transmissions and requesting information Information Request Workflow
Summary
In this article, we introduced a method for building a fully automated system in which once a name and email address are entered in the information request form, there is no further human involvement.
When the request information is entered in the request form, a URL for viewing the materials is sent to the requester by email. The URL has an expiration date, so even if it is shared on social networking sites the impact is minimized.
The fully automated system reduces the time and effort required for file copying and sharing settings compared to manual handling. In addition, it prevents mistakes such as forgetting to respond to a request, delay, sending an incorrect file, or misdirecting the email to the wrong recipient.
By using the automation items provided in the no-code development platform Questetra BPM Suite, you can build a system that automatically processes file copying and shared link creation without any knowledge or experience of Box’s API (Application Programming Interface).
Questetra BPM Suite is available on a 60-day free trial basis. If you are interested please apply from the following link.
The mechanism described in this article limits the number of files that can be shared to one, but this article will show you how to build a mechanism that facilitates the sharing of multiple files.
No-Code Development Platform Questetra BPM Suite
The cloud-based no-code development platform Questetra BPM Suite is used to automate operations.
In Questetra BPM Suite a business system is constructed through the creation of workflow diagrams. In the constructed system, business data is not only digitized, the system also automates the transfer of business data between people, as well as performing text conversion, numerical calculations, email transmission, etc. Furthermore, data integration to other cloud services can also be automated.
No-Code Development Platform Questetra BPM Suite Overview
Such automation is achieved by placing items in the workflow diagram that will be automatically processed in some way at the desired time. For example, when the sales manager approves a quote, the quote file is uploaded to Box.
Various automation items available in Questetra BPM Suite will allow you to automate your operations easily.
Box Cloud Storage Folder Creation
Box is a cloud storage service for businesses. The Box case studies page lists over 100,000 customers and 67% are Fortune 500 companies (confirmed 2022-02-15).
The automation items provided in the Questetra BPM Suite (v13.3.0) introduced in the previous section are related to Box.
Box: Upload File
Box: Copy File
Box: Move File
Box: Create Shared Link to File
Box: Delete Shared Link of File
Box: Delete File
Box: Download File
Box: Create Folder
Box: Search Folder
Box: Create Shared Link to Folder
Box: Delete Shared Link of Folder
Box: Delete Folder
Box: Add Collaboration
Box: Delete Collaboration
[Box: Upload File], [Box: Create Folder] and [Box: Create Shared Link to Folder] (shown above in bold) will be used for the mechanism to be created in the next section.
There is one limitation to this mechanism. Only one file can be submitted at a time.
When a salesperson submits a quotation it is not uncommon for it to be submitted together with several other documents, for example, a proposal, a price list, and service/product introduction materials. Sometimes multiple quotations are submitted. In addition, for the sales manager who approves the quotation, the documents submitted at the same time as the quotation may have a significant impact on the approval decision.
The system we are building will allow automatic submission of multiple files to customers.
The following operations are systematized using Questetra BPM Suite.
A salesperson creates a quotation file.
The sales manager decides whether to approve the quotation file.
A folder is created in Box.
A shared link is generated in the created folder.
The approved quote file is uploaded to the folder created in Box.
An email is sent to the customer with the shared link to the quote file.
Within this workflow, the latter four processes (in bold) are handled automatically.
First, we will create a workflow diagram of this business. (Constructed with Questetra BPM Suite below)
Quote Approval Workflow Diagram
The following three processes in the workflow diagram are handled by people (blue square item)
1. Quotation Preparation (by sales staff)
2. Quotation Approval (by sales manager)
3. Response to Feedback (by sales staff)
If the quotation is approved in [2. Quotation Approval] a folder will be automatically created on Box. The gray item [4. Create Folder] will automatically create a shared link to the folder. [5. Upload Quotation] will automatically upload the approved quotation to the folder.
Finally, [7. Email to Customer] will send an email to the customer with the shared link inserted.
Setting up Automated Items
Create a parent folder in Box where the folder for submission will be created. Set the part of the URL of the created parent folder (the blue part below) in “C2: Parent Folder ID” in [4. Create Folder].
https://example.app.box.com/folder/xxxxxxxxxxx
Create & Approve Quotes Processing ScreenAutomatic creation of folders for Box quotation submissionQuote Approval Workflow
Summary
We introduced how to build a system in which multiple files are automatically uploaded to Box cloud storage and a shared link is created to the folder in which they are stored.
The following process has been automated.
A folder is created in Box
A shared link is created in the created folder.
Approved quote files are uploaded to the Box folder with the related documents.
An email with the shared link is sent to the customer
This automation reduces the time and effort required to create folders, set up shared links, and send e-mails to customers. In addition, the following mistakes are prevented compared to manually doing these tasks.
Forgotten or delayed folder creation
Failure to set up shared links
Failure to set up shared links (incorrect expiration date or password)
Forgotten or late uploading of files
Incorrect file upload location
Incorrect email address or body
By using the automation items provided in Questetra BPM Suite, a no-code development platform used for automation, you can build a system in which files are automatically uploaded to Box and shared links are automatically created, even if you have no knowledge or experience with Box’s API (Application Programming Interface).
Questetra BPM Suite is available on a 60-day free trial basis. If you are interested please apply from the following link.
In Recommendation for Automation – Box File Upload we showed you how to build a system in which files are automatically uploaded to the Box cloud storage. It is well worth it to eliminate the hassle of file uploads. However, there is a limitation in the system we built in this article: the files can only be shared with people in your company.
This article will show you how to build a system that allows you to share files with people outside the company.
No-Code Development Platform Questetra BPM Suite
The cloud-based no-code development platform Questetra BPM Suite is used to automate operations.
In Questetra BPM Suite a business system is constructed through the creation of workflow diagrams. In the constructed system, business data is not only digitized, the system also automates the transfer of business data between people, as well as performing text conversion, numerical calculations, email transmission, etc. Furthermore, data integration to other cloud services can also be automated.
No-Code Development Platform Questetra BPM Suite Overview
Such automation is achieved by placing items in the workflow diagram that will be automatically processed in some way at the desired time. For example, when the sales manager approves a quote, the quote file is uploaded to the Box.
Various automation items available in Questetra BPM Suite will allow you to automate your operations easily.
Box Cloud Storage File Sharing Link
Box is a cloud storage service for businesses. The Box case studies page lists over 100,000 customers and 67% are Fortune 500 companies (confirmed 2022-02-15).
The automation items provided in the Questetra BPM Suite (v13.3.0) introduced in the previous section are related to Box.
Box: Upload File
Box: Copy File
Box: Move File
Box: Create Shared Link to File
Box: Delete Shared Link of File
Box: Delete File
Box: Download File
Box: Create Folder
Box: Search Folder
Box: Create Shared Link to Folder
Box: Delete Shared Link of Folder
Box: Delete Folder
Box: Add Collaboration
Box: Delete Collaboration
[Box: Upload File] and [Box: Create Shared Link to File] (shown above in bold) will be used for the mechanism to be created in the next section.
Automated Submission of Approved Quotations
In a previous article, Recommendation for Automation – Google Drive: Upload File we showed how approved quote files are automatically uploaded to Google Drive. In Google Drive the share settings for a folder are set to “Anyone with the link” so that files uploaded to that folder can be shared with people outside the company.
Box does not have a similar setting, but it does allow you to create a shared link to a file. When a shared link is created for a file, anyone who knows the link will be able to access the file. It is also possible to set an expiration date for that link and a password to view the file.
Using [Box: Create Shared Link to File] in Questetra BPM Suite you can build a system that automatically creates a shared link to a file.
This time, the following operations will be systematized using Questetra BPM Suite.
A salesperson creates a quotation file.
The latter three processes (in bold) of this work flow are processed automatically.
First, we will create a workflow diagram of this operation. (Constructed with Questetra BPM Suite below.)
Quotation Approval Workflow Diagram
The following three processes in the workflow diagram are handled by users (blue square items)
1. Quotation Preparation (by sales staff)
2. Quotation Approval (by sales manager)
3. Response to returned quotations (by sales staff)
If the quote is approved at [2. Quotation Approval], the approved quote will be automatically uploaded to Box in the gray item [4. Upload Quotation]. [5. Create Shared Link] will automatically create a shared link to the quote file. Finally, [6. Email to Customer] will send an email with the shared link to the customer.
Setting up automated items
Create a folder in Box in advance where the files will be uploaded. In the “C3: The folder ID that files will be uploaded” field of [4. Upload quotation] set the URL of the created folder (the blue part below).
https://example.app.box.com/folder/xxxxxxxxxxx
The following figure shows an image of sales staff creating a quotation and finally sending an email to the customer with a URL (shared link) to view the quotation.
Quote Approval Workflow
Summary
We introduced how to build a system in which files are automatically uploaded to Box cloud storage and a shared link is created for the file.
The following processes have been automated.
An approved quote file is uploaded to Box
A shared link is created for the quote file
An email with the shared link is sent to the customer
This automation reduces the time and effort required to upload files, set up shared links, and send e-mails to customers. In addition, the following errors are also prevented compared to doing these things manually.
Forgotten or delayed file uploads
Incorrect file upload location
Failure to set up shared links
Incorrect settings for shared links (expiration date, password)
Errors in the address or body of an email
By using the automation items provided in Questetra BPM Suite, a no-code development platform used for automation, you can build a system in which files are automatically uploaded to Box and shared links are automatically created, even if you have no knowledge or experience with Box’s API (Application Programming Interface).
Questetra BPM Suite is available for a 60-day free trial. If you are interested, please apply from the following link.
Questetra BPM Suite はクラウド型のワークフローです。ワークフローのメリットについては上の項でも述べましたが、クラウド型はオフィスと同じシステムにどこからでも簡単にアクセスして仕事ができるのが強みです。自宅からでも通勤中の車内からでも、定義されたプロセスにアクセスして業務を進められるので、テレワークにも適しています。
ワークフローや BPM ツールといったソフトウェアの多くは、サーバへのセットアップなど利用するまでの準備が大変ですが、Questetra BPM Suite はお申し込み後すぐにご利用できるのもポイントです。また、さまざまな業務に応用できるテンプレートも豊富に用意されているため、気軽に業務プロセス定義にチャレンジすることができます。
I believe that many companies are using Box for cloud storage. In particular, many companies may have migrated their internal file server system to Box in order to establish a remote work system during the COVID pandemic.
In this article, we will show you how to create a system in which files are automatically uploaded to the Box folder when a person does something particular.
40No-Code Development Platform Questetra BPM Suite
The cloud-based no-code development platform Questetra BPM Suite is used to automate operations.
In Questetra BPM Suite a business system is constructed through the creation of workflow diagrams. In the constructed system, business data is not only digitized, the system also automates the transfer of business data between people, as well as performing text conversion, numerical calculations, email transmission, etc. Furthermore, data integration to other cloud services can also be automated.
No-Code Development Platform Questetra BPM Suite Overview
Such automation is achieved by placing items in the workflow diagram that will be automatically processed in some way at the desired time. For example, when a contact person enters a response to an inquiry, the inquiry details and the response can be automatically appended to a Google Sheet.
Various automation items are available in Questetra BPM Suite. By using these items you can automate your business processes easily (with no code).
Box Cloud Storage Service File Upload
Box is a cloud storage service for businesses that allows users to store files of any format over the Internet. 97,000 companies use Box and 68% of Fortune 500 companies use it.
The automation items provided in the Questetra BPM Suite introduced in the previous section are available for Box. (v13.3.0)
Box: Upload File
Box: Copy File
Box: Move File
Box: Create Shared Link to File
Box: Delete Shared Link of File
Box: Delete File
Box: Download File
Box: Create Folder
Box: Search Folder
Box: Create Shared Link to Folder
Box: Delete Shared Link of Folder
Box: Delete Folder
Box: Add Collaboration
Box: Delete Collaboration
The mechanism we will create in the next section will use [Box: Upload File] (shown above in bold).
Upload Image Files Automatically After Review
The following operations will be systematized using Questetra BPM Suite.
A client who needs some images, such as a member of the marketing department, requests the production of the images.
The image production team’s staff produces images based on the request. The completed image is attached.
The reviewer checks the image and decides whether it is ok or not.
The image is uploaded to the Box and an email with the URL of the image is sent to the client.
The last two steps, uploading the image to Box and sending the image URL by e-mail (in bold), are handled automatically.
First, we will create such a workflow diagram. (Constructed with Questetra BPM Suite below.)
Image Production Workflow Diagram
The following four processes in the workflow diagram are processes that are handled by users. (Items in blue squares)
1. Image production request (by production requestor)
2. Image production (by production staff)
3. Review (by reviewer)
4. Feedback response (by production staff)
If the image is OK’d at the [3. Review] step, the completed image is automatically uploaded to the Box at the gray item [5. Upload to Box]. The image URL will then be automatically sent to the client via email using the round item [6. Image Completion Report Mail].
Setting up Automated Items
Create a folder in Box in advance to which files will be uploaded. Set the part of the URL of the created folder (the blue part shown below) to “C3: The folder ID that files will be uploaded” in [5. Upload to Box].
https://example.app.box.com/folder/xxxxxxxxxxx
The following image shows how the image attached at the [2. Image Production] step will be uploaded to Box.
Automated Image Production Operations
Summary
We showed how to build a system in which files are automatically uploaded to Box cloud storage.
This time we have automated the following processes:
When the reviewer OKs the produced image, it is uploaded to Box.
The URL of the uploaded image is sent via email
This automation reduces the time and effort of uploading files and sending e-mails to requesters. In addition, the following errors are prevented.
Forgetting to upload a file
Uploading files to the wrong location
Incorrect email address or body
By using the automation items provided in Questetra BPM Suite, the no-code development platform used for this automation, you can build a system in which files are automatically uploaded to Box without any knowledge or experience with Box’s API (Application Programming Interface).
Questetra BPM Suite is available on a 60-day free trial basis. If you are interested, please apply from the following link.
Many companies use WordPress to create and update their corporate websites and product/service websites.
This time, we would like to introduce a way to automate part of the WordPress posting and page posting process to save your time and effort.
How to Automate Posting to WordPress
Cloud Service Tools to Prepare
The tools we will use are WordPress and Questetra BPM Suite.
Questetra BPM Suite is a business system platform that allows you to build a business system with no code. The steps on the workflow diagram are processed in the order they are placed on the workflow diagram.
How Drafts are Automatically Created
Set up the information of the site you want to submit articles to Questetra BPM Suite, such as the information of the site and the post title, the content of the post. Questetra BPM Suite will send a signal to automatically create a draft article in WordPress based on the settings information.
A draft post is automatically created in WordPress and information such as the URL of the draft post is sent to Questetra BPM Suite.
How it is Submitted to WordPress
Below is a workflow diagram depicting the process of getting a draft posted to WordPress, using an automated processing item that will automatically post the draft to WordPress.
WordPress Article Submission workflow diagram
Specifically, posting to WordPress is completed in the following order
Human Task: Set the title/article body/excerpt/post type (post/page), etc.
Automatic processing items: A draft is automatically created in WordPress based on the information set in 1.
Human Task: Check the draft created in WordPress and publish it (click the [Post] button when completed).
By adopting this business process, all the contributor has to do is fill in the required fields on the input form as shown in the figure below, check the completed draft, and click the “Submit” button. This simplifies the submission process and saves labor.
Image of the input form for the Input Submission Details process
※ Input form items can be created/configured for each process.
How to Utilize it in Business Processes
The main feature of Questetra BPM Suite is that it can be used in organizations involving multiple people/multiple departments.
When creating or updating a website, especially a corporate website or a product page, it is necessary to post accurate information. Questetra BPM Suite helps to realize such a cross-functional business process within a company.
In addition, Questetra BPM Suite allows the use of automated items in business processes involving multiple people/departments. In the workflow diagram that you create you can set up both processes that are handled by humans (e.g. creating a post, checking the content, etc.) and processes that are handled by the system (e.g. items that automatically create a draft of an article). This makes it possible to improve efficiency and save labor even in operations involving organizations.
The workflow diagram below illustrates the use of an automated item in which draft articles are automatically added to WordPress for a business process in an organization.
The specific process treatment flow is as follows
Human Task: Input the title/article body/excerpt/post type (post/page), etc.
Human Task: Check the contents set in 1. If any modification is necessary, it is sent back to be corrected.
Automatic Task: A draft is automatically created and added to WordPress based on the information set in 1.
Human Task: Check the draft created in WordPress, and publish it (click the [Post] button when completed).
Human Task: Check the posted content. If it needs to be revised, it is sent back to be revised.
Thus, with Questetra BPM Suite, drafts are automatically created and added to WordPress, which makes your work more efficient by shortening your work time.
In addition, irregularities in work can be prevented because work can proceed according to the workflow diagram. In addition to this, it is also possible to improve the quality of work and reduce errors by including a checking process in the workflow.
Google アナリティクスのマニュアルに『新しいイベントは、初めてトリガーされてからしばらくの間、表には表示されません』と記載されているように、GA4 の[設定]メニューにある[イベント]はナカナカ更新されません(202205現在)。Custom Events は、別途 Google Sheets などで管理した方が良いかも知れません。
正直なトコ、2022年5月現在、この「オーディエンスTriggers」には未完成な印象を感じます。マニュアル表記が “インターフェース” (≒仕様)と異なるケースも多く、また、解決策(パラメータ値のセットや追加等)が明示されていないケースも少なくありません。 ◇オーディエンスのメンバーシップが更新されたときに追加のイベントを作成する(1 日 1 回まで) →”オーディエンスのメンバーシップが更新されると追加のイベントがログに記録されます” ◇Create an additional event (up to one per day) when the audience membership refreshes →”Log an additional event when audience membership refreshes” とは言うものの「オーディエンスTrigger (Events)」は、デキルコトが飛躍的に増える、とても魅力的な機能です。今後の仕様推移を見守りたいと思います。
HTML を書き換えることなく、さまざまな「タグ」(Tracking tag)〔←小さなプログラム〕を追加できます。”計測タグ” を HTML に埋め込む作業が不要になるだけでなく、様々な “計測タグ” をいつでもいくつでも、追加・変更できるようになります。
具体的には2012年、『Google Tag Manager』というサービスが誕生しました。各Webページには「GTMタグ」(親)という “ハコ”(←[コンテナ])だけを用意しておきます。そして “ナカミ” である各「計測タグ」(子)は、Google Tag Manager(GTM)側によってコントロールします。一般には「タグ管理システム」と呼ばれます。